[2008-09-17] Self-disinfecting toilet brush
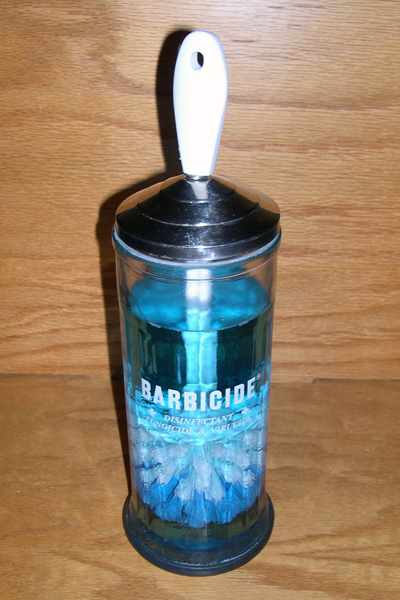
What the heck do you do with the toilet brush right after you use it? Hang it up? Lay it in the sink or bathtub to dry first? Or maybe you have one of those brushes with a built-in base that keeps the bristles corraled when not in use. All of these alternatives kinda skeenge me out, honestly, and whether it's realistic or not I have a kind of horror of loose toilet brushes and the germs I imagine growing on them. So I often find myself standing over the commode with a freshly-used toilet brush wishing I had some more sanitary place to put it.
This is my Howard-Hughesian solution. A standard round plastic toilet brush is built into the lid of a barber's disinfecting jar, so that the lid forms a sort of "guard" for the brush when it is withdrawn for use. When you're done scrubbing, the dirty brush goes back down into the jar until the lid is back in place, submerging the bristles in disinfectant, where they are continuosly stored when not in use. I used generic barber's disinfectant from the beauty store, which comes concentrated and is diluted many-fold for use. The disinfectant is cheap to begin with; add to that the fact that the closed-lid design reduces evaporative losses to essentially zero and the expense associated with the disinfectant becomes trivial. You can also add detergent to assist in cleaning the bowl.
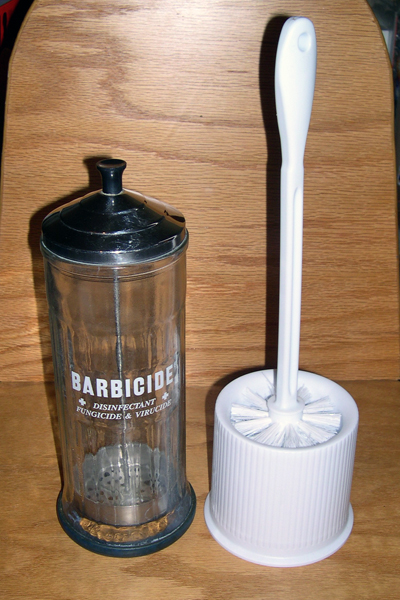
Shown above are your starting materials: A standard round plastic toilet brush from the grocery store and a barber's glass disinfecting jar. You'll also need a 1/4" dowel screw, and two flat washers and two lock washers to fit it. Required tools are a handsaw and an electric drill with a bit sized for the dowel screw. A pair of pliars will also be handy.
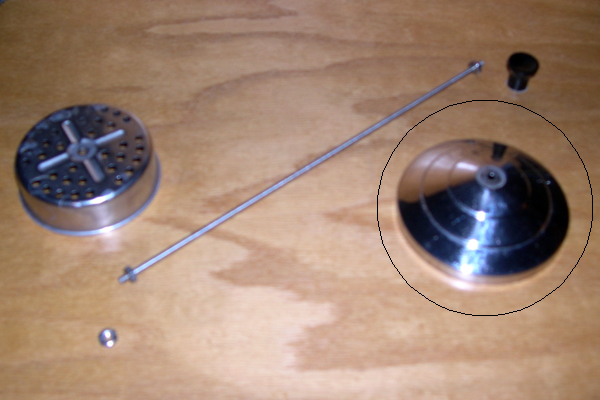
The above photo shows the diassembled lid assembly of the disinfecting jar. The "filter," tie rod, handle, and retaining nut are all discarded. Only the conical sheet metal lid is retained.
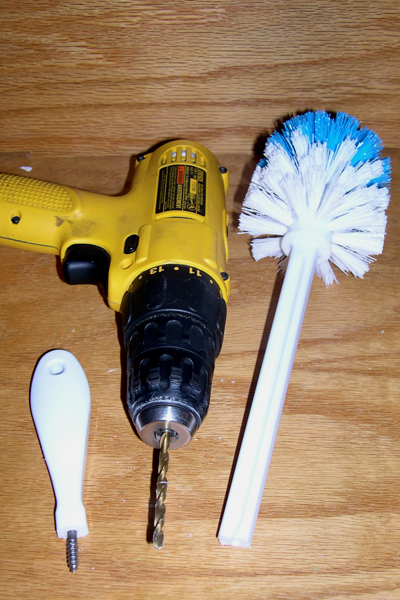
As shown above, after cutting the handle of the toilet brush at an appropriate point, holes are drilled into the cut surfaces of the handle, and the dowel screw threaded into one side.
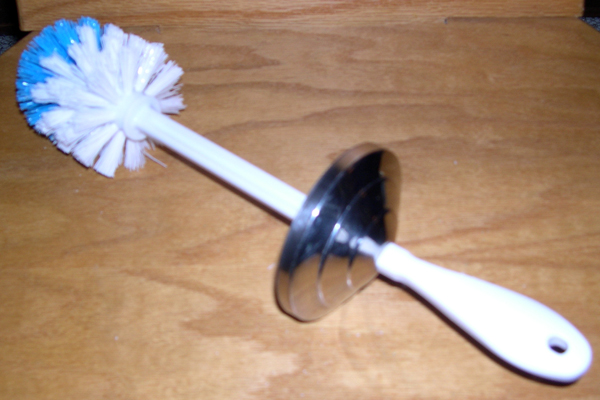
Now it's just a matter of fitting the lid between the two cut handle sections. The dowel screw passes through the hole in the center of the lid, which will probably have to be enlarged using the electric drill to accept it. A flat washer and a lock washer on each side of the lid will help keep the assembly from twisting loose over time.
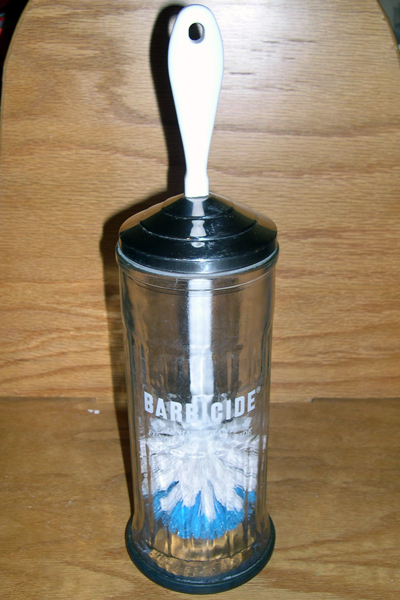
Test the fit of the brush/lid assembly on the jar, and construction is complete. All that remains is to pour in and dilute the disinfectant per the label directions.
last modified 2008-09-17